
Learn how to set the time on a Sharp alarm clock effortlessly with our step-by-step guide. Never miss an appointment again!
Today, we will delve into the art of time mastery with a focus on setting the time on a Sharp alarm clock with perfect precision. Many of us rely on our alarm clocks for a timely start to our day, yet often overlook the importance of accurately setting the time. A mistake in setting the time can lead to a disrupted morning routine, potentially causing stress and missed appointments.
In this informative blog post, we will guide you through the simple yet crucial steps to ensure your Sharp alarm clock is perfectly synchronized with your daily schedule. Whether you are a stickler for punctuality or simply want to make the most of your mornings, mastering the art of time setting is essential for a smooth start to your day.
Key Takeaways:
- Follow the manufacturer’s instructions: Always refer to the user manual for specific steps on setting the time on your Sharp alarm clock.
- Use the correct buttons: Ensure you are pressing the designated buttons for setting the time, typically labelled “Time” or “Clock.”
- Double-check AM/PM: Pay attention to whether you are setting the time for morning or afternoon to avoid any confusion later on.
- Adjust for daylight saving time: Be prepared to change your clock forward or backwards as needed when DST begins or ends.
- Regularly check for accuracy: Verify the time on your clock periodically to ensure it remains in sync and functioning correctly.

Understanding Your Sharp Alarm Clock
To set the time on your Sharp alarm clock with precision, you must first understand its various features and functions. If you are unsure about how to navigate your specific model, you can always refer to the official Sharp website or seek assistance from customer support.
If you are looking for information on how to set the time zone on a Sharp atomic clock, you can find a helpful guide here.
Model Identification
Understanding the specific model of your Sharp alarm clock is crucial for setting the time accurately. Consult the user manual or look for the model number on the back or bottom of the clock. Different models may have slightly different methods for time setting and navigation, so it’s important to know which model you have.
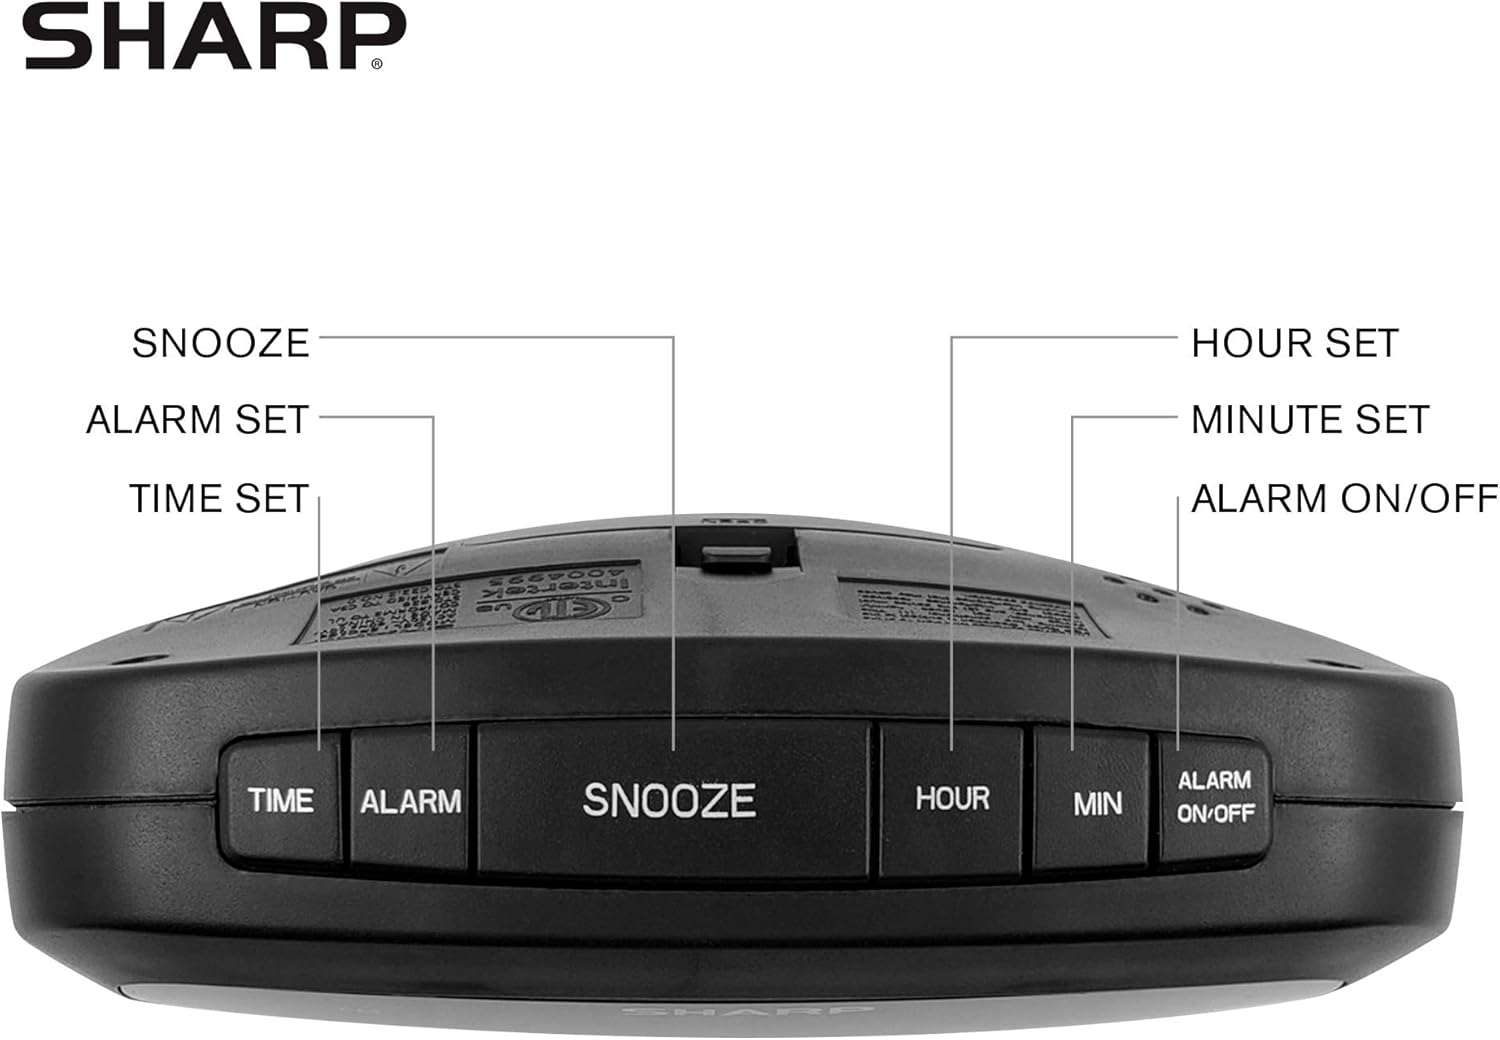
Navigating the Control Panel
Clock navigation on a Sharp alarm clock can vary depending on the model. It typically involves using the buttons on the control panel to access the time setting mode and make adjustments. It’s important to familiarize yourself with the control panel layout and button functions to ensure smooth navigation.
Navigating the Control Panel: When navigating the control panel, take note of the specific buttons used for time setting, such as the “Time” or “Set” button. Understanding how to navigate the control panel is essential for accurately setting the time on your Sharp alarm clock.

Setting the Time on Your Sharp Alarm Clock
One of the most important features of an alarm clock is its ability to display the accurate time. Setting the time on your Sharp alarm clock is a simple process that ensures you wake up on time and stay on schedule throughout the day.
Step-by-Step Guide
Since there are variations between Sharp alarm clock models, here’s a general step-by-step guide that should help for most cases:
Step-by-Step Guide
-
Locate the Time Setting Buttons:
- Look for buttons labeled “Time,” “Set,” “Clock,” or “Mode.” These are usually located on the back or top of the clock.
- There might be separate “Hour” and “Minute” buttons.
-
Enter Time Setting Mode:
- Press and hold the primary time setting button (“Time,” “Set,” etc.) for a few seconds. The time display should start blinking.
-
Adjust the Hour:
- While the display is blinking, use the “Hour” button or a designated up/down button to adjust the hour.
- Pay attention to any AM/PM indicator if your model has one.
-
Adjust the Minutes:
- Use the “Minute” button or the designated up/down button to set the correct minutes.
-
Confirm the Time:
- Press the primary time setting button (“Time”, “Set,” etc.) again to exit time setting mode. The blinking should stop.
Important Notes:
- Battery powered models: If your model runs on batteries, sometimes removing and reinserting the batteries will reset the clock and force you into time-setting mode.
- Specific models: For the most accurate instructions, always refer to your Sharp alarm clock’s user manual, which you may be able to find online.
| Step | Instructions |
| 1 | Locate the “Time” or “Clock” button on your alarm clock. |
| 2 | Press the “Time” or “Clock” button and hold it down. |
| 3 | Use the arrow buttons to adjust the hour and minute to the correct time. |
| 4 | Release the “Time” or “Clock” button to set the time. |
Troubleshooting Common Issues
Guide If you encounter issues when setting the time on your Sharp alarm clock, refer to the following troubleshooting tips:
If you are unable to set the time on your alarm clock, ensure that you are following the correct steps as outlined in the user manual. If the issue persists, try replacing the batteries or resetting the clock to its default settings. It is important to follow the instructions carefully to ensure the clock displays the accurate time.
Alarm Configuration for Effective Time Mastery
To truly master your time, it is crucial to have a reliable alarm clock that helps you start your day on time. Sharp alarm clocks are known for their precision and functionality, making them a popular choice for individuals seeking to improve their time management skills. In this chapter, we will explore how to configure the alarm settings on a Sharp alarm clock for perfect time mastery.
Setting a One-time Alarm
Alarm setting on a Sharp alarm clock is a straightforward process. To set a one-time alarm, locate the alarm set button on the clock and press it. Use the hour and minute buttons to select the desired alarm time. Ensure to toggle the alarm on switch to activate the alarm. Once set, the alarm will go off at the specified time, helping you stay punctual and organized throughout your day.
For a one-time alarm, it is essential to double-check the set time to avoid any mishaps. Sharp alarm clocks offer a loud and clear alarm sound to ensure you wake up on time. By setting a one-time alarm, you can meet important deadlines, appointments, or events without worrying about oversleeping.
Programming Recurring Alarms
On a Sharp alarm clock, programming recurring alarms is a breeze. Simply press the alarm set button and use the hour and minute buttons to choose the desired alarm time. To set the alarm to repeat, adjust the repeat function to your preferred frequency – whether it’s daily, weekdays, or weekends. This feature is perfect for setting up your daily wake-up routine or reminders for regular tasks.
Configuration of recurring alarms allows you to customize your alarm schedule according to your weekly routine. This flexibility ensures that you never miss important meetings, appointments, or engagements. With the convenience of recurring alarms, you can stay on track and make the most of every day with precise time management.

Maximizing the Use of Your Sharp Alarm Clock
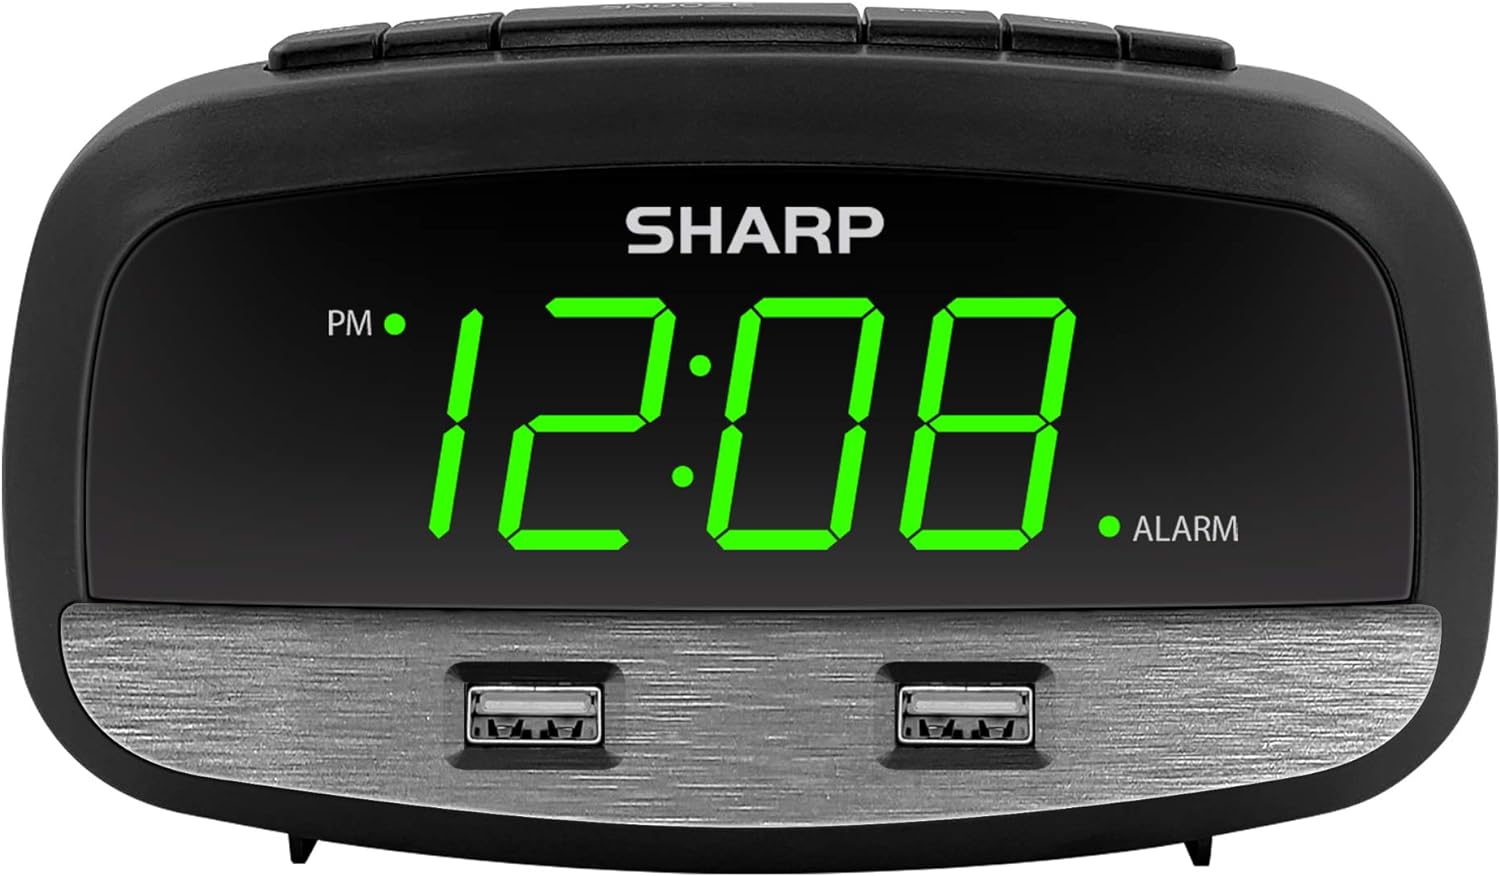
Unlike other alarm clocks, the SHARP Digital Clock with Alarm and Dual USB offers precision in time management with its advanced features and easy-to-use interface. To make the most out of your Sharp alarm clock, follow these tips to maximize its functionality and help you take control of your time.
Additional Time Management Tips
Additional time management tips can help you make the most out of your day. Set multiple alarms for different tasks or events to keep you on track and ensure no important deadlines are missed. Utilize the USB charging ports to keep your devices charged and ready to go at all times.
- Use the adjustable brightness feature to customize the display to your preference
- Take advantage of the multi-function display for easy access to date, time, and alarm settings
- Maximize the alarm volume to ensure you never miss an important event
Any effective time management strategy is about making the most of every minute, and leveraging these additional tips can help you do just that.
Leveraging Advanced Features
Alarm and snooze options are key features of the Sharp alarm clock, allowing you to customize your wake-up routine to suit your needs. The programmable daily alarms feature ensures you are always on schedule, while the dual USB charging ports keep your devices powered at all times.
- Alarm Volume Control: Set the volume of your alarms to your liking
- Time Zone Selector: Easily switch between different time zones for convenient travel or remote work
- Battery Backup: Ensure your alarm clock stays functional even during power outages
Any savvy time master knows that leveraging these advanced features is crucial for staying on top of your schedule and maximizing productivity. With these tools at your disposal, you can take full control of your time and make the most out of every day.
Read More:
- How to Set Emerson Alarm Clock: A Sweet Wake-up Call
- How to Set Westclox Alarm Clock Easily- Easy to Follow
- How to Set Time on ihome Alarm Clock-Easy Steps To Follow
Final Words
Now that you have learned how to set the time on a Sharp alarm clock for perfect precision, you are well on your way to mastering your time management skills. By following the simple steps outlined in this guide, you can ensure that your alarm clock is always set accurately and that you start your day off on the right foot. Remember, time mastery is key to achieving your goals and staying organized.
With your newfound knowledge, you can take control of your schedule and make the most out of every minute. So, set your Sharp alarm clock with confidence and watch as your productivity soars.
FAQ’s
FAQ 1: Do all Sharp alarm clocks have the same time-setting process?
Answer: No, while there are similarities, different Sharp alarm clock models have slight variations in how you set the time. It’s always best to consult your specific model’s manual for the most accurate instructions.
FAQ 2: My Sharp alarm clock doesn’t have a ‘time’ button. How do I change the time?
Answer: Some Sharp models use a multi-function button like “Set” or “Mode”. You’ll likely need to press and hold this button, then use additional buttons to cycle through hours and minutes. Refer to your manual for your model’s exact process.
FAQ 3: How do I know if my Sharp alarm clock is set to AM or PM?
Answer: Most Sharp alarm clocks have a small AM/PM indicator light or symbol on the display. If the PM indicator is lit, your time is set for the afternoon/evening.
FAQ 4: I tried setting the time on my Sharp alarm clock, but the display keeps blinking. What’s wrong?
Answer: A blinking display often means the clock is still in time-setting mode. Look for a “Set” or “Enter” type button to confirm your changes and finalize the time.
FAQ 5: Can I set a 24-hour clock format on my Sharp alarm clock?
Answer: This feature depends on your model. Some Sharp alarm clocks allow you to switch between 12-hour (AM/PM) and 24-hour (military time) formats. Check your model’s instructions to see if this is possible and how to do it.
Q: How do I set the time on my Sharp alarm clock?
A: To set the time on your Sharp alarm clock, locate the time or clock set button on the clock. Press and hold it until the time display starts blinking. Use the hour and minute buttons to set the correct time, then press the time or clock set button again to save your changes.
Q: What if my Sharp alarm clock has a 24-hour time display?
A: If your Sharp alarm clock uses a 24-hour time display, follow the same steps as for a 12-hour clock, but remember that the numbers will range from 00 to 23 for hours instead of 1 to 12.
Q: Why is it important to set the time on my alarm clock with precision?
A: Setting the time on your alarm clock with precision ensures that your alarms will go off at the correct times, helping you maintain a consistent schedule and preventing unnecessary stress. It also ensures that the clock can accurately display the time for your convenience.
Q: My Sharp alarm clock has a daylight saving time (DST) function – how do I use it?
A: If your region observes daylight saving time, you can use the DST function on your Sharp alarm clock to automatically adjust the time. Simply locate the DST button, usually on the back of the clock, and press it to activate or deactivate the function as needed.
Q: What should I do if my Sharp alarm clock doesn’t seem to be keeping the correct time?
A: If your Sharp alarm clock isn’t keeping the correct time, try replacing the batteries if it’s a battery-operated clock. If the clock is plugged into an electrical outlet, ensure that the outlet is functioning properly. If the issue persists, consider contacting Sharp customer support for further assistance.